Entering Exam Settings
There are 2 ways to access "Entering Exam Settings":
-
Exams -> All Exams -> + New exam -> Step 3: Customized settings -> General settings -> Entering Exam
-
Exams -> All Exams -> Settings (Choose a created exam) -> General settings -> Entering Exam
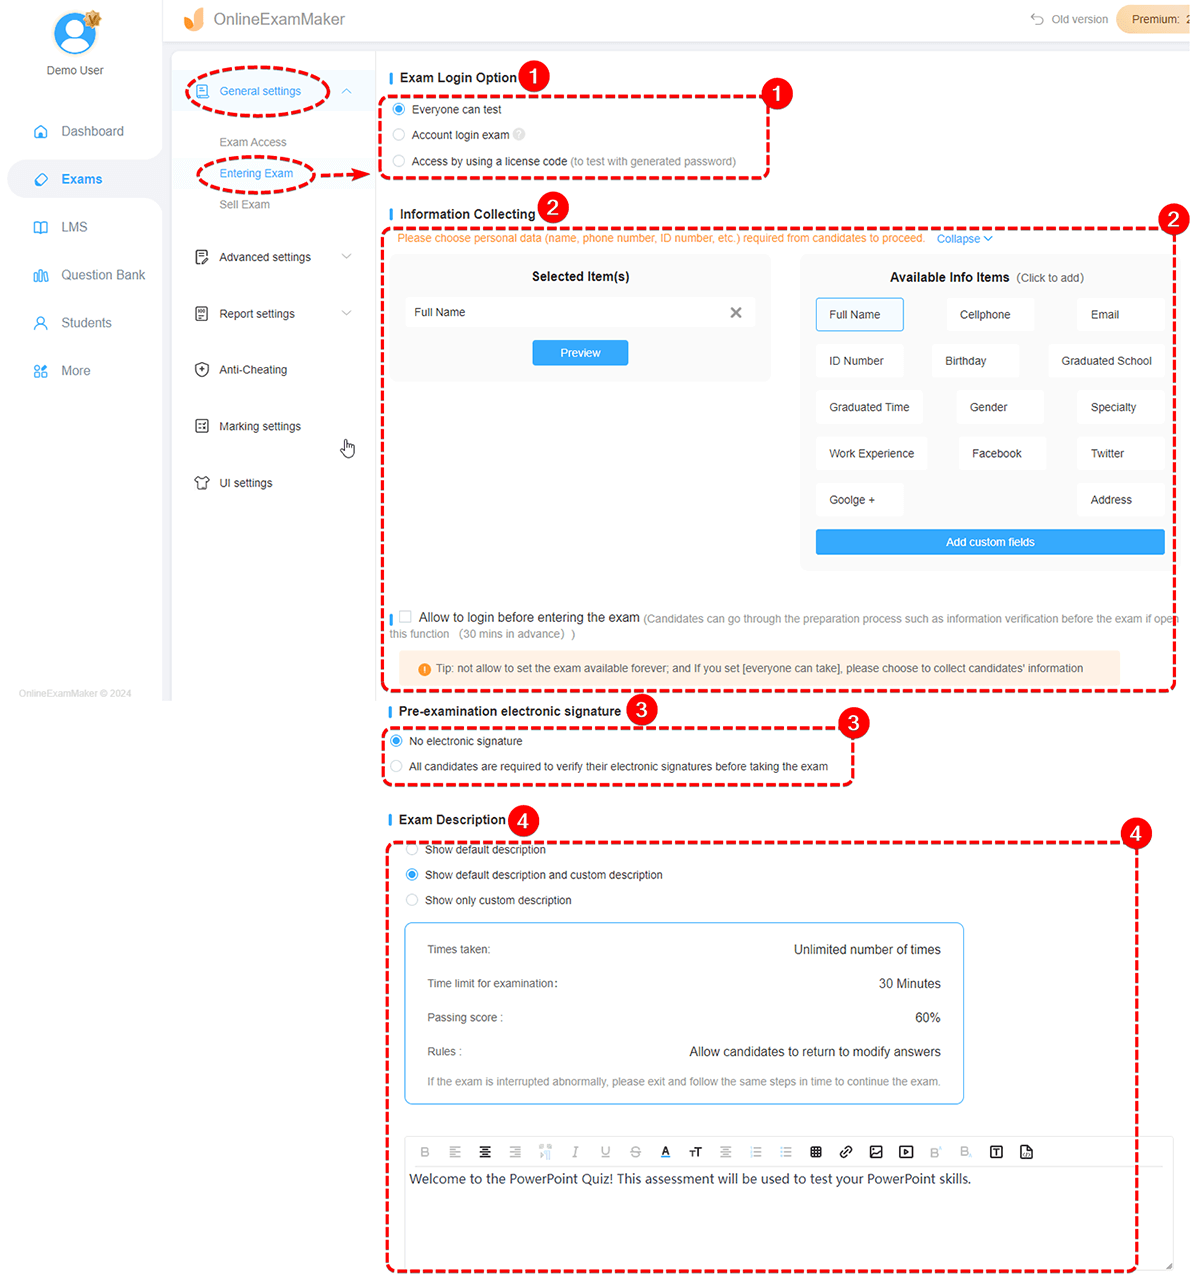
1. Exam Login Option
- Everyone can test: Anybody with the exam link can attend and take the online exam.

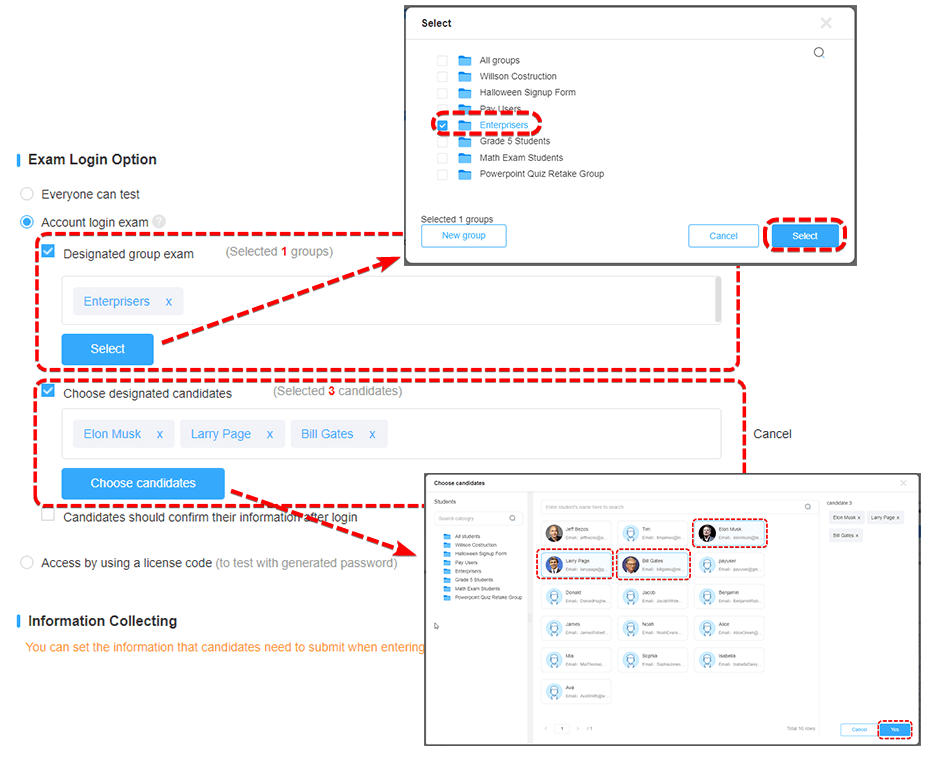
- Account login exam: You can assign the exam to a group, or to designated candidates in OnlineExamMaker student management system, only the candidate with an account can access the exam.
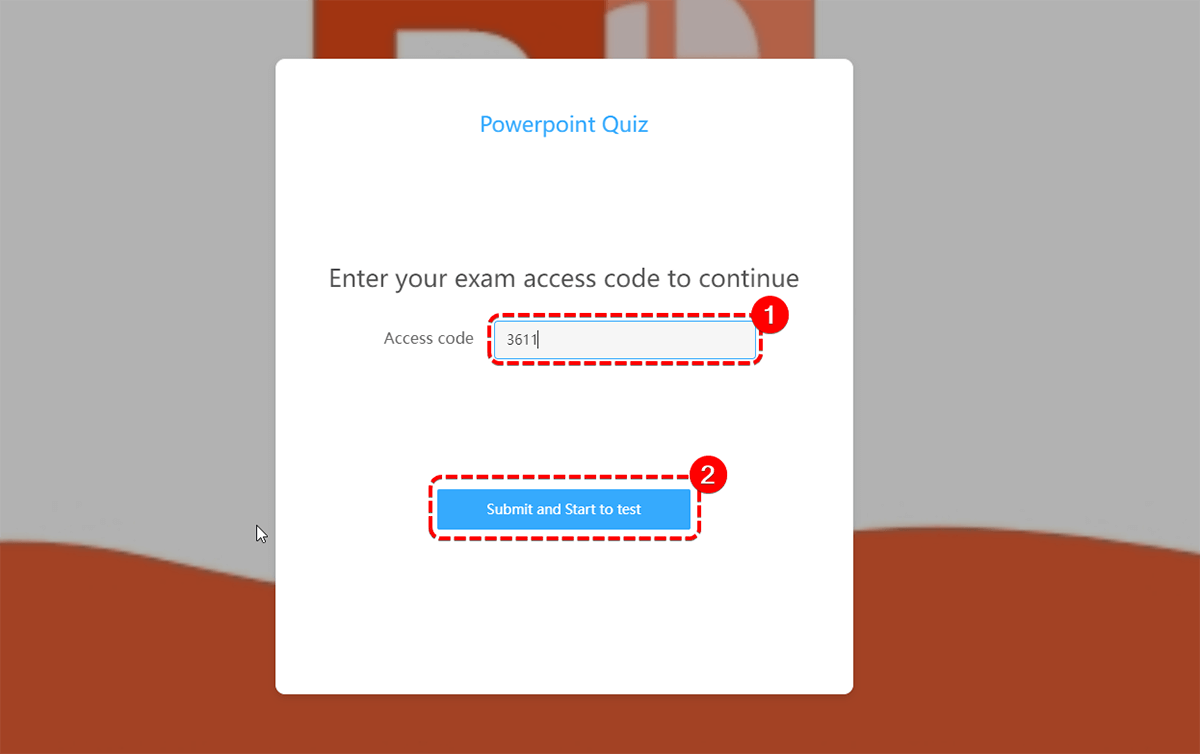
- Access by using a license code: Candidates can access the online exam with an access code.
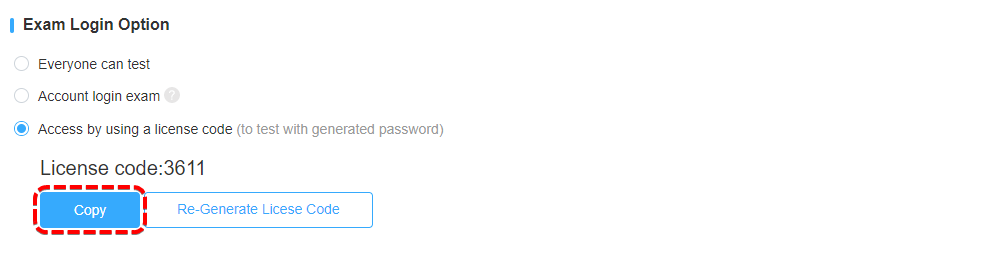
The image below is the screenshot of using a license code in the beginning of the exam:
2. Information Collecting
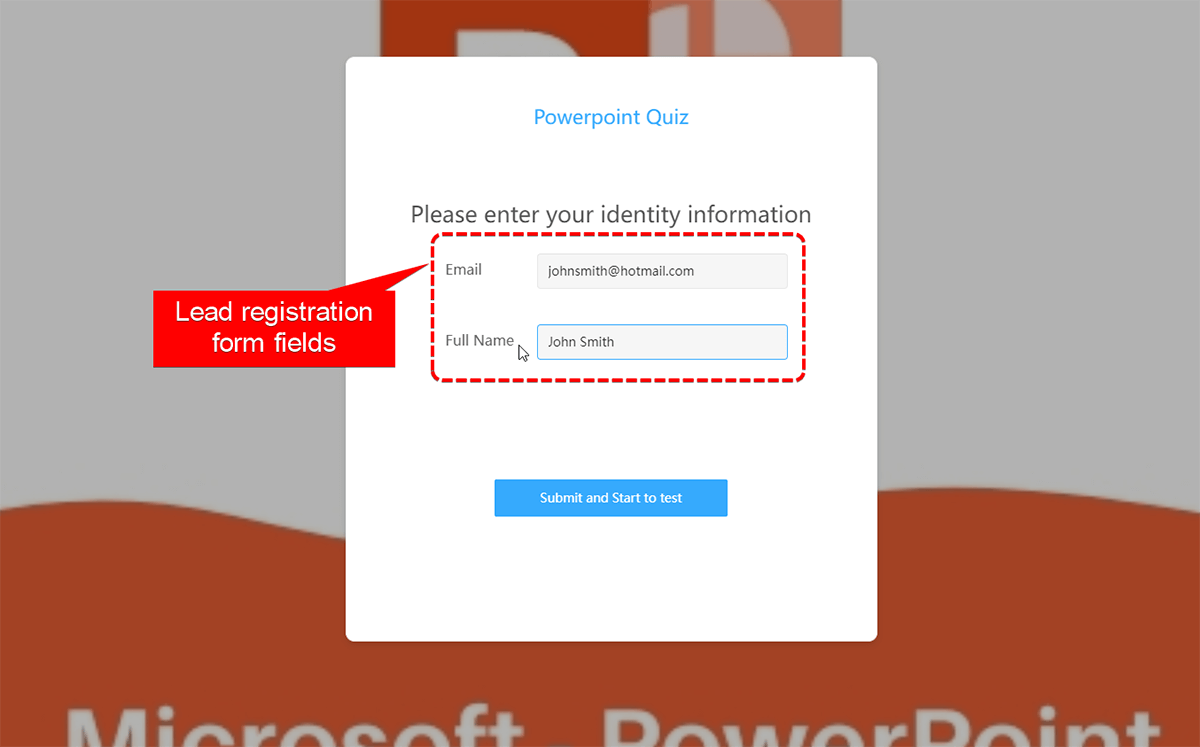
Lead registration form: Create a lead registration form for your online exam, exam takers are required to fill the form to access the exam.
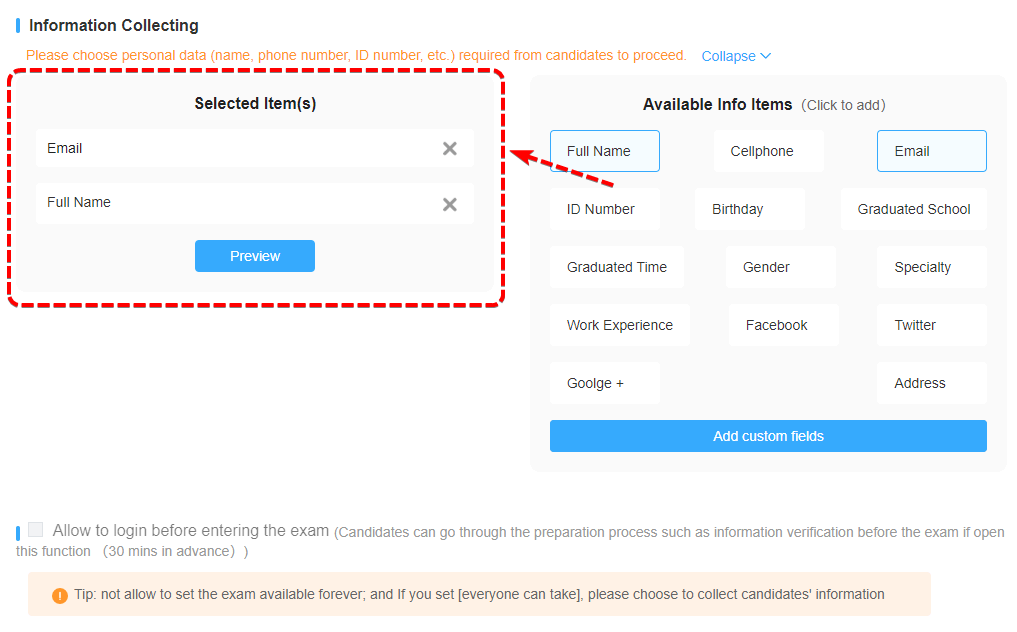
The image below is the screenshot of the lead registration form in the online exam:
Login before entering the exam: If you check this checkbox, candidates can go through the preparation process such as information verification 30 minutes before the exam start.
3. Pre-examination Electronic Signature
No electronic signature: No electronic signature required.
All candidates are required to verify their electronic signatures: Student are required to add an electronic signature to access the exam.
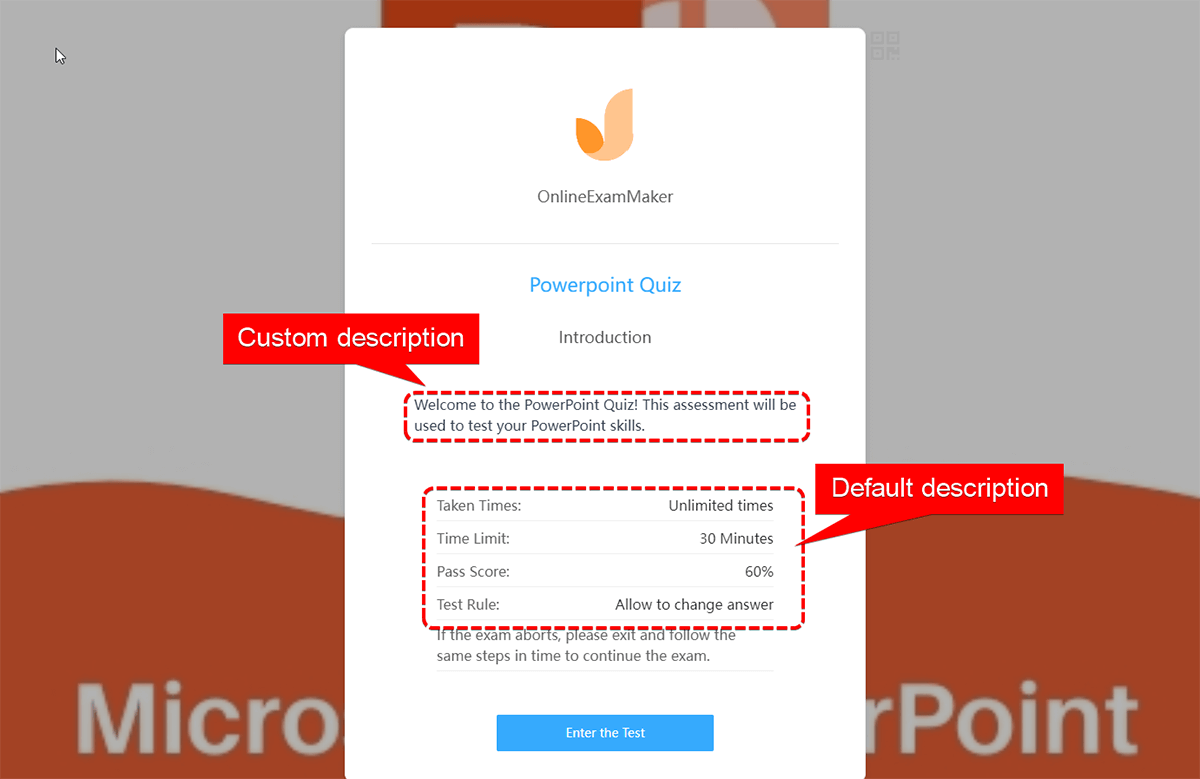
4. Exam Description
Show default description: Only show default description provided by OnlineExamMaker system.
Show default description and custom description: Show both default description and custom description. Exam organizers can edit custom description in the text entry box below.
Show only custom description: Hide default description, and show custom description only.
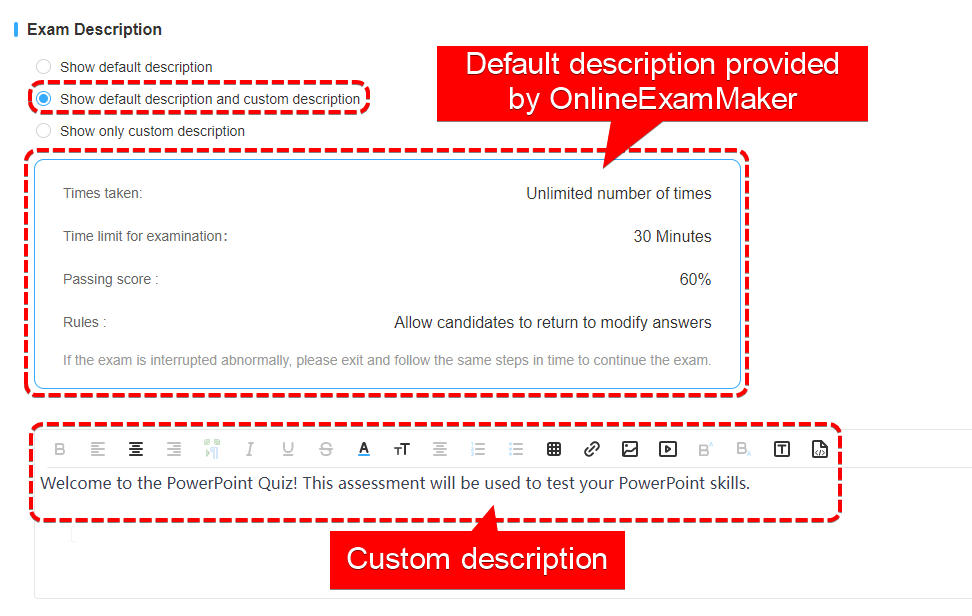
The image below is the screenshot of the default and custom description in the online exam: